Master Sticky Rice & Roll Perfect Spicy Tuna Sushi at Home
The thought of crafting your own sushi at home often conjures images of highly skilled chefs and intricate techniques. It can seem daunting, a culinary Everest reserved for the pros. But what if we told you that creating an easy spicy tuna roll, bursting with fresh flavor and perfectly textured rice, is well within your grasp? Prepare to demystify homemade sushi, because with our comprehensive guide, you’re about to unlock the secrets to restaurant-quality results right in your own kitchen.
This article isn't just another recipe; it's your personal sushi masterclass. We'll walk you through every step, from selecting the right ingredients to mastering the art of sticky rice – the undisputed foundation of any great sushi roll. Forget the intimidation; we’ve simplified the process, focusing on approachable methods and readily available components, ensuring that even the most novice home chef can achieve a delicious and impressive outcome. Get ready to impress your friends, family, and most importantly, yourself, with a homemade spicy tuna roll that rivals your favorite takeout.
Why Dive into Homemade Spicy Tuna Rolls?
Beyond the sheer satisfaction of creating something delicious from scratch, making your own restaurant-quality spicy tuna rolls offers a multitude of compelling benefits:
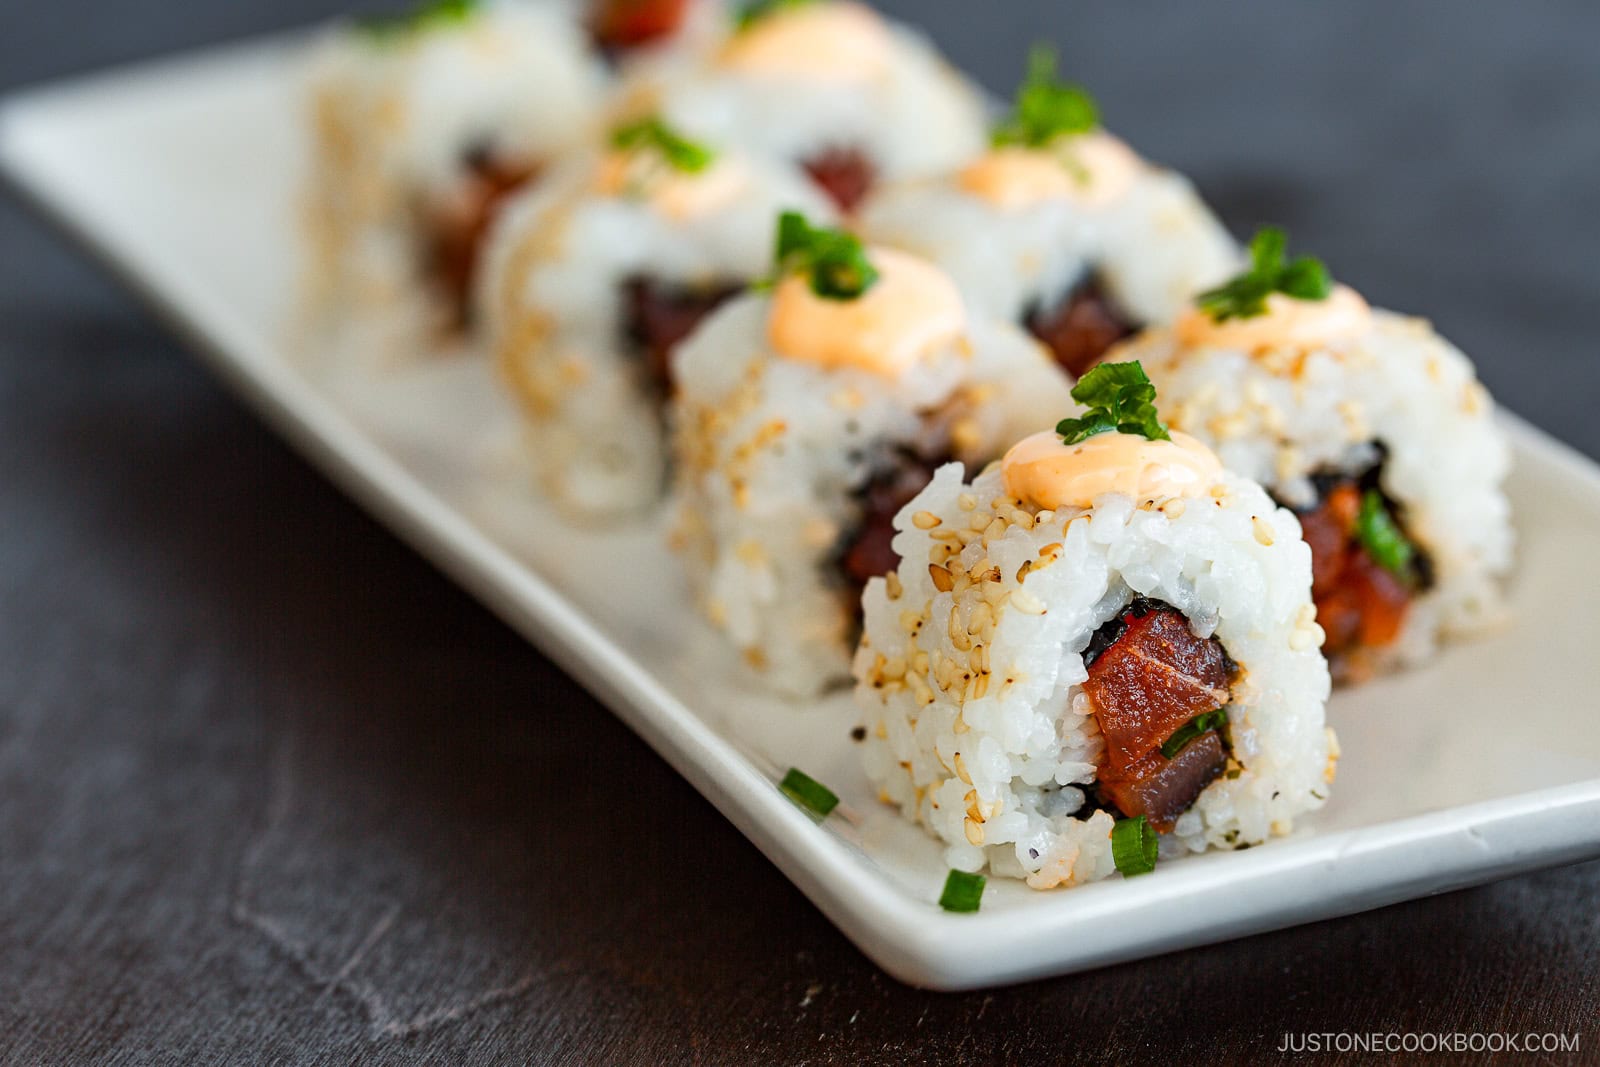
- A Guaranteed Crowd-Pleaser: The spicy tuna roll is a universal favorite for a reason. Its vibrant flavor profile – the rich, fresh tuna, the creamy heat of the spicy mayo, and the delicate crunch of nori – makes it an irresistible appetizer or light meal. Whether you’re hosting a dinner party, a casual get-together, or simply treating your family, these rolls are sure to disappear fast.
- Surprisingly Budget-Friendly: A trip to a sushi restaurant can quickly add up, especially when ordering multiple rolls. Crafting sushi at home significantly slashes the cost without compromising on quality. By sourcing your ingredients wisely, you’ll discover just how economical it is to enjoy this gourmet treat on a regular basis. Think of the savings you'll accumulate over time!
- Empoweringly Fool-Proof: We understand the apprehension, but our method is designed to be forgiving and straightforward. We break down each step into manageable actions, building your confidence as you go. There’s immense satisfaction in learning a new skill and producing something so delicious, proving to yourself that gourmet cooking isn't just for the professionals.
- Unleash Your Inner Chef: Customization is Key: One of the greatest advantages of making sushi at home is the freedom to customize. Love extra spice? Add more chili-garlic sauce. Craving a textural crunch? Throw in some finely diced cucumber or avocado. Want to experiment with other additions like tobiko or a sprinkle of sesame seeds? Go for it! You control the ingredients, ensuring every roll is exactly to your liking and caters to any dietary preferences. This level of personalized deliciousness is something you rarely get from ordering out.
The Essentials: What You'll Need for Your Sushi Adventure
To embark on your easy spicy tuna roll journey, gather these key ingredients. Remember, quality matters, especially for the tuna, as it's the star of the show!
- Sushi-Grade Tuna: This is paramount. "Sushi-grade" or "sashimi-grade" signifies that the fish has been handled and processed in a way that makes it safe for raw consumption. It's often flash-frozen at sea to maintain freshness and eliminate parasites. Look for vibrant red, firm tuna steaks at reputable fish markets or in the freezer section of high-quality grocery stores. For an authentic "negitoro" experience (finely minced tuna, often with scallions), you can finely dice or gently scrape the tuna with a spoon to create a soft, almost melt-in-your-mouth texture.
- Mayonnaise: The creamy base for your spicy mayo. We recommend a good quality, full-fat Japanese mayonnaise like Kewpie for its rich flavor, but any good quality mayo will work.
- Chili Garlic Sauce: This is where the "spicy" in spicy tuna roll comes from! It's packed with flavor and heat. Adjust the amount to your preferred spice level. Sriracha is a popular alternative if you prefer a different type of heat.
- Cooked Sticky Rice (Sushi Rice): The foundation of your roll. We'll detail how to make it perfectly below. Always use short-grain or medium-grain sushi rice for the ideal sticky, yet individual, grain texture.
- Nori (Seaweed Sheets): These crispy, umami-rich sheets are what hold your sushi together. Ensure they are fresh and crisp for the best rolling experience.
- Furikake: A Japanese seasoning blend typically made with dried seaweed, sesame seeds, dried fish flakes, and sometimes sugar and salt. It adds an incredible depth of umami and a delightful textural crunch. Don't skip this if you can find it!
- Green Onions (Scallions): Finely chopped green onions add a mild, fresh onion flavor and a pleasant crunch, balancing the richness of the tuna.
Beyond the Basics: Optional Additions & Equipment
To elevate your rolls or for added convenience, consider:
- Avocado & Cucumber: Sliced avocado adds a buttery richness, while thin strips of cucumber provide a refreshing crunch.
- Toasted Sesame Seeds: A sprinkle on the outside of your roll adds nuttiness and visual appeal.
- Sushi Rolling Mat (Makisu): While not strictly essential for all rolls, a bamboo mat makes rolling much easier and tighter.
- Sharp Knife: A very sharp, damp knife is crucial for clean, professional-looking cuts that don't tear the nori or squish the rice.
- Small Bowl of Water: Essential for keeping your hands and knife damp, preventing rice from sticking.
The Secret to Sushi Success: Perfect Sticky Rice
The rice is the soul of sushi. Achieving that perfect balance of stickiness, tenderness, and subtle flavor is what elevates homemade sushi from good to exceptional. Here’s how to master it:
- Rinse, Rinse, Rinse: This is a non-negotiable step. Measure 1 cup of uncooked sushi rice. Place it in a fine-mesh sieve or a bowl and rinse it under cold running water. Stir and agitate the rice with your hand until the water runs clear (this usually takes 2-3 minutes). This removes excess starch, which is key to achieving individual yet sticky grains and preventing a gummy texture.
- Instant Pot Method (Recommended for Ease):
- After rinsing, add the rice to your Instant Pot with 1 cup of cold water. Give it a gentle stir to ensure all rice is submerged.
- Close the lid, set the vent to sealing, and cook on high pressure for 4 minutes.
- Once cooking is complete, allow the pressure to naturally release for 8-10 minutes. Then, manually release any remaining pressure.
- Carefully open the lid, fluff the rice with a rice paddle or fork, and transfer it to a large, non-metallic bowl.
- Stovetop Method (Alternative):
- After rinsing, combine 1 cup of rice with 1 ¼ cups of cold water in a heavy-bottomed saucepan with a tight-fitting lid.
- Bring to a boil over medium-high heat. Once boiling, reduce heat to the lowest setting, cover tightly, and simmer for 15 minutes.
- Remove from heat (keeping the lid on!) and let it steam, undisturbed, for another 10-15 minutes. This allows the steam to redistribute, resulting in perfectly cooked, fluffy rice.
- Fluff and transfer to a large, non-metallic bowl.
- Seasoning the Rice (The Secret Ingredient!): This is what gives sushi rice its distinctive, slightly sweet and tangy flavor.
- While the rice is still warm (but not hot), gently fold in sushi vinegar. You can buy pre-made sushi vinegar, or easily make your own by warming 2 tablespoons of rice vinegar with 1 teaspoon of sugar and ½ teaspoon of salt until dissolved.
- Pour the seasoning over the warm rice and use a cutting motion with a rice paddle or wooden spoon to gently incorporate it, trying not to mash the grains.
- Cooling: Spread the seasoned rice thinly in the bowl. You can fan it gently to help it cool quickly to room temperature. This also helps develop its glossy texture. Do not refrigerate warm rice, as it will become hard.
Rolling Like a Pro: Tips for Your Spicy Tuna Masterpiece
With your perfect sticky rice and delicious spicy tuna filling ready, it’s time for the grand finale – rolling! Don’t let this step intimidate you; a little practice and these tips will have you rolling like a seasoned pro.
- Keep it Wet: Hands and Mat: This is the golden rule for mess-free sushi rolling. Have a small bowl of cold water handy. Constantly moisten your hands to prevent the sticky rice from clinging. If using a bamboo mat, lightly dampen it too (or cover it with plastic wrap for easier cleanup). This slipperiness helps the rice and nori glide, making the roll much smoother.
- Prepare Your Nori: Place a sheet of nori, shiny side down, on your bamboo rolling mat (or directly on a clean surface if not using a mat).
- Spread the Rice Evenly: With damp hands, take a handful of sticky rice (about ¾ cup for a full sheet of nori) and gently spread it evenly across the nori, leaving about a ½ to ¾ inch border along the top edge of the sheet. This border will help seal the roll. Don't press too hard; you want an even, not compacted, layer.
- Add Your Filling: Arrange your spicy tuna mixture and any other desired fillings (like avocado or cucumber) in a line, slightly below the center of the rice-covered nori. Be mindful not to overfill, as this makes rolling much harder and can lead to breakage.
- The Roll and Squeeze Technique: Lift the edge of the nori closest to you with the mat, and bring it over the filling, tucking it in gently. Begin to roll forward, applying gentle, even pressure. As you roll, use your fingers to tuck the ingredients in and the mat to shape and tighten the roll. Give it a gentle squeeze every now and then to compress the rice and ensure the roll holds together firmly. The goal is a compact, uniform cylinder.
- Seal the Deal: Once you've rolled to the top border, use a tiny bit of water on your finger to moisten the exposed nori edge. This will act as a natural glue, sealing your roll securely.
- The Perfect Slice: A very sharp, damp knife is your best friend here. Wipe your knife blade with a damp cloth after every one or two cuts to prevent rice from sticking and ensure clean, precise slices. Cut the roll in half, then cut each half into 3 or 4 equal pieces, depending on your desired thickness.
Remember, practice makes perfect. Your first roll might not be magazine-worthy, but it will certainly be delicious! Each subsequent roll will be tidier and tighter, and soon you'll be rolling with confidence. For a deeper dive into starting your sushi journey, check out our Beginner's Guide: Easy Spicy Tuna Rolls You Can Make Today. And if you're aiming for that truly authentic, professional finish, our guide to Restaurant-Quality Spicy Tuna Rolls Made Simple at Home offers advanced insights.
Conclusion
You’ve now gained the knowledge and confidence to master the easy spicy tuna roll at home. From crafting the perfectly seasoned sticky rice to assembling and rolling your masterpiece, every step is designed to be approachable and rewarding. Gone are the days of sushi intimidation; in their place is the satisfaction of creating delicious, budget-friendly, and customizable sushi that rivals your favorite restaurant. So, gather your ingredients, follow these tips, and prepare to embark on a delightful culinary adventure. Your homemade spicy tuna rolls are waiting!
